TL;DR

Get wellness gear delivered free with Prime
- Fast, free delivery on millions of items
- Prime Video, Amazon Music and more included
- Member-only deals all year
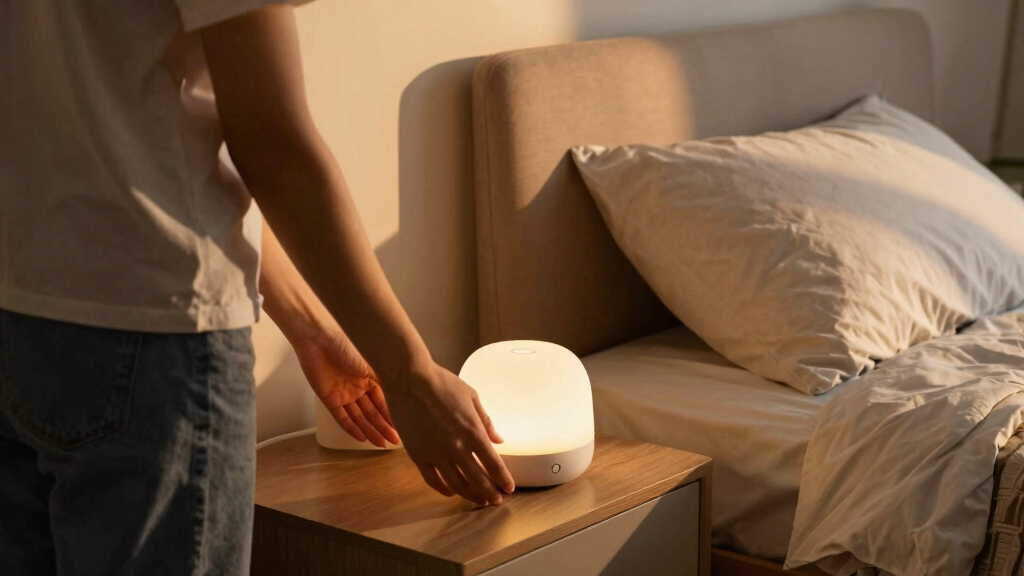
Positioning a wake-up light effectively when your bed faces away involves using reflective surfaces like walls or ceilings to bounce light toward your face. Proper placement enhances the sunrise simulation, helping you wake naturally without direct exposure. Small adjustments can make a big difference in your morning routine.
If your bed faces away from your wake-up light, you might wonder how to get that gentle sunrise effect without repositioning your entire room. The good news? With some strategic placement, you can make your light work for you—no matter the room layout.
This guide dives into practical, easy-to-apply tips for positioning your wake-up light so it illuminates your face naturally, even if your bed isn’t directly facing the device. You’ll learn how to use reflective surfaces, adjust angles, and optimize your space to wake up refreshed and alert.
Positioning a Wake-Up Light When Your Bed Faces Away
You do not need to rearrange the room to get a convincing sunrise. Aim the light at a pale wall, ceiling, or carefully positioned mirror so a broad, comfortable glow reaches your face without harsh direct exposure.
Turn the room into a soft light source
When the device sits behind you, the most useful path is rarely a straight one. Reflected light spreads across a larger area, reduces glare, and can create a more natural transition from darkness to morning brightness.
Choose pale and smooth
White or light-colored walls and ceilings return more useful light. Matte surfaces produce a broad glow; glossy surfaces reflect more strongly but may create hotspots.
Aim above the pillow
Direct the beam upward or diagonally toward the wall beside the head of the bed. The reflected pool should reach your closed eyes without feeling sharp.
Lift the source
Place the device around eye level or slightly higher. A stable shelf, bedside table, or secure clip mount helps prevent shadows from furniture and bedding.
The reflected route sacrifices some peak intensity, but the tradeoff is often worthwhile: softer distribution, less glare, and greater placement flexibility in small or cluttered rooms. Begin with a bright wall close to the bed, then move the device only if coverage is insufficient.
From device to daylight effect
Treat placement as a short experiment. Change one variable at a time so you can see whether surface, angle, height, or brightness produced the improvement.
Identify surfaces
Locate the nearest pale wall, ceiling plane, corner, or stable mirror path.
Set the angle
Tilt the device until the reflected pool lands around the head and upper bed.
Run the sunrise
Test the full 20–30 minute ramp in normal nighttime room conditions.
Adjust gently
Move or tilt in small increments until brightness feels even and comfortable.
Choose the route that fits your room
A wall bounce is the best default for most rooms. Ceiling reflection improves coverage, while a mirror provides direction when the available device position is especially awkward.
| Method | Softness | Coverage | Setup effort | Glare risk | Best use |
|---|---|---|---|---|---|
| Wall bounce | ✓High | ✓Focused | ✓Low | ~Low | Best all-round starting point |
| Ceiling bounce | ✓Very high | ✓Wide | ✓Low | ~Very low | Small rooms and broad diffusion |
| Mirror redirect | ~Medium | ~Precise | ×Higher | ×Higher | Awkward angles with no pale wall |
| Direct bedside | ×Lower | ~Narrow | ✓Low | ×Highest | When gentle direct exposure is comfortable |
Relative reflected-light potential
Lighter, smoother surfaces generally return more usable light toward the bed. These bars are practical comparison guides rather than laboratory measurements.
Build brightness gradually
A sunrise simulation should begin before the alarm and increase steadily instead of switching immediately to full output.
Recommended window: let brightness rise over approximately 20–30 minutes. Reflected setups may benefit from a slightly earlier start or a higher final setting.
Fine-tune an awkward room
Compact rooms reward flexibility. Adjustable hardware, portable placement, and layered ambient light can solve limitations without permanent fixtures or major furniture changes.
Use an adjustable light
A tilting or rotating model makes it easier to target a wall, ceiling, or corner while avoiding harsh shadows.
Stay near reflection
Shorter distance to a pale surface preserves more brightness and creates a stronger reflected pool.
Change one angle
Small tilts can reshape the entire glow. Test incremental changes instead of moving everything at once.
Try a secure clip
A portable or clip-on source can reach useful heights, provided the mount is stable and the output is consistent.
Layer soft sources
Pair the wake-up light with a dim ambient lamp for broader coverage, taking care not to create an abrupt brightness jump.
A good sunrise can take the scenic route.
Position the device near a light-colored surface, aim it toward the head of the bed, and run a full sunrise test. Optimize for comfortable light reaching your face—not for the device itself being visible. Once the path works, save the angle and brightness settings for a consistent morning routine.
How to Make Your Wake-Up Light Shine in Your Face When Your Bed Faces Away
The key? Use walls, ceilings, or mirrors to bounce light toward you. Position the light at an angle that directs its glow to reflect off these surfaces, creating a natural sunrise effect inside your room.
Why does this matter? Because direct light can sometimes be uncomfortable or too harsh, especially if you’re sensitive to brightness. Indirect reflection disperses the light more evenly, reducing glare and creating a softer, more natural wake-up experience. This approach also allows you to position the light farther from your bed, which can be advantageous in small or cluttered rooms. However, it requires understanding the room’s surfaces and how to angle your device effectively. The tradeoff? You might need a bit more time for the light to reach its full brightness, but the comfort and natural feel often outweigh this minor delay.
Think of it like watering a plant with a gentle spray—indirect, but effective. You won’t get the same intensity as direct exposure, but the diffuse glow can wake you gently and naturally, making your morning less abrupt.
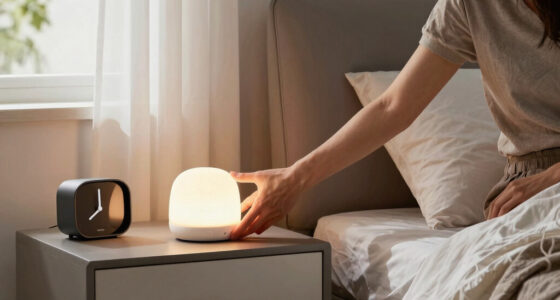
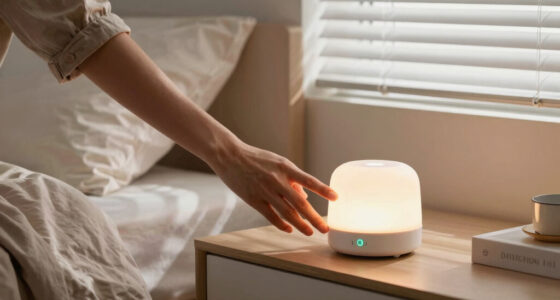
wake-up light with reflective surface
As an affiliate, we earn on qualifying purchases.
As an affiliate, we earn on qualifying purchases.
5 Tips for Perfectly Positioning Your Wake-Up Light in Small or Odd-Shaped Rooms
- Use adjustable lights: Choose a model with flexible angles so you can direct the light where it works best. This flexibility allows you to fine-tune the reflection and avoid harsh glare or shadows, which can disturb your sleep or cause discomfort.
- Place near reflective surfaces: Walls, ceilings, or even a mirror can bounce light toward your face. Understanding the material and color of these surfaces is crucial; lighter, glossy, or smooth surfaces reflect more light, enhancing the sunrise effect. The tradeoff here is that too many reflective surfaces can sometimes cause uneven lighting or unwanted glare, so balance and testing are key.
- Experiment with angles: Start with the light slightly angled upward or toward a corner, then adjust until you find the most natural and comfortable reflection. Small changes in angle can significantly alter how the light disperses, impacting how natural and effective your wake-up is.
- Consider a portable or clip-on light: These give you more control over placement in tricky spaces. They allow you to position the light at optimal angles without permanent fixtures, but note that portability might come at the expense of some stability or brightness consistency.
- Use multiple light sources: Combine your wake-up light with soft ambient lamps to increase overall brightness and coverage. This layered approach can create a more immersive sunrise simulation, but it also requires balancing different light intensities to avoid overstimulation or uneven lighting.
In small or oddly shaped rooms, the key is to leverage surfaces and angles intelligently. For example, angling the light toward a white wall or ceiling can amplify the glow without overwhelming your senses. The tradeoff is that it may require some trial and error to find the perfect setup, but once optimized, it offers a natural, soothing wake-up process that works even in confined spaces.
As an affiliate, we earn on qualifying purchases.
Progression and Practical Application: From Understanding to Implementation
Before you start repositioning or experimenting with your wake-up light, it’s helpful to understand the basic principles of light reflection and room layout. Recognizing how surfaces like walls, ceilings, and mirrors interact with light allows you to make informed decisions about placement. Start by identifying reflective surfaces in your room and consider how their color and texture influence light diffusion. Then, test different angles with your device, observing how the light disperses and whether it reaches your face comfortably. Small adjustments—like tilting the light slightly upward or toward a corner—can significantly improve the effect. Keep in mind that patience and experimentation are key; what works perfectly in one space might need tweaking in another. By systematically applying these steps, you can optimize your wake-up routine for a gentle, natural experience tailored to your room’s unique layout.
reflective wall panels for light bounce
As an affiliate, we earn on qualifying purchases.
As an affiliate, we earn on qualifying purchases.
Conclusion: Achieving a Natural Wake-Up Even When Your Bed Faces Away
In summary, strategically positioning your wake-up light using reflective surfaces and thoughtful angles can transform your morning routine. Even if your bed doesn’t face the light directly, leveraging room features allows you to enjoy the benefits of a gentle sunrise simulation. Remember, understanding your space and experimenting with placement are crucial steps toward a more natural, soothing wake-up experience. Start small—adjust angles, test surfaces, and consider additional light sources—and soon you’ll find the optimal setup that awakens you gradually and comfortably. Your next step? Take a walk around your room, identify potential reflective surfaces, and try out different positions for your wake-up light. With a bit of patience, you’ll enhance your mornings and wake up feeling refreshed every day.
As an affiliate, we earn on qualifying purchases.
Halloween Picks
halloween
As an affiliate, we earn on qualifying purchases.